Tuesday, December 3, 2013

Shelves in the craftroom!!

Shelves! I got shelves!


Look at what my sweet boyfriend did for me :) - I buy the things I want to hang on the walls and expect him to do the work for me. These are going to be used for my fabric - that way I'll be able to see everything a lot easier.
The only dilemma I had was how to store all of my lace trim and small sample pieces of fabric. But I think I've found a solution - I'm going to buy a couple of messageboards - you know, those made from cork, and I'm just going to pin all the scrap pieces onto the board (just 1 pin in the corner of each piece) - easy to see, easy to access and easy to clean up and reorganize - Pretty genious, if I must say so myself, haha
 
 
Isn't it odd how much stuff you can accumulate.. And not just small things you can let go of - no! there are so many possibilities for each individual item,. so many things you could make!
 
 
I'm really trying to organize every corner of my craft room - which also Means buying tools I've been wanting (otherwise I don't know where to put them once I'm done rearranging everything - logical, right?).
So I bought a printer! :) - we already have a printer,.. but it hates me, and I'm not particularly fond of that either!
I do have that small canon printer that I got last year for Christmas. love it! but there's just 1 problem; it's a laser printer, so I can't do any prints on fabric or textured paper, and I have so many ideas for miniatures which requires a printer.
 
I will admit though, that I buy stuff for very odd reasons. Today I bought a box of lovely quality chocolates.. Did I want the chocolates? not really, I just wanted the metal box that they came in! it's some nice metal, really is. Perfect thickness for using in miniatures - not too thin and bendable, but not too stiff and difficult to cut either.
I'm sure my co-workers didn't mind - I placed it in the lunch room at Work for everyone to have a taste :)


Friday, November 22, 2013

Rearranging my craft room

Rearranging my craft room

 
Right from when we moved here and up until now, my craft room has been divided into 2 'sections' - on the left I had all my craft/polymer clay and art supplies and on the right I had my setup of nail art stuff. That has changed. I'm not done organizing everything, and I haven't quite figured out where I want every single item and 'section' to go, BUT, I have moved all my nail supplies away from the desk. I still do my nails, and I'm trying to get back into posting nail tutorials on my YouTube at least once a week, but craft supplies just take up so much more room than nail polish - and the more Space you have to spread your stuff on, the more inviting it feels to sit down and start a new project - do you know that feeling?
I'm still debating with myself whether I want the other desk to be focusing on art stuff; Color pencils, pencils, watercolors etc. or if I should move my doll making supplies to that area; Doll clay, wire for armatures, tools, tin foil and my mohair.. I usually end up sitting in our livingroom when making Dolls and my boyfriend isn't all that excited about me leaving all my tools in the sofa - can't blame him, haha ;)
One of the main reasons why I don't sit at my 'clay.crafting desk' when sculpting Dolls is because of the mohair - which seems like a lame excuse now that I think about it... but when you're wigging a doll, mohair sometimes gets everywhere, and it's frustrating to find tons of small pieces of hair when you're trying to make hairless miniature food. I figured it'd be easier having it seperated.. maybe it won't make much of a difference.. I don't know.
 
If you haven't kept an eye on my youtube channel since my last post you've already missed 6 new tutorials! :) If you'd like to see how to make any of these polymer clay pieces just click the link and it'll take you to my channel: SugarCharmShop

 
There's a basic orange tutorial, a cute Pikachu (Pokemon) pendant, another way of making an eyeball cane when making glass like doll eyes. There's also a tutorial for crepes, a quick tutorial for a watermelon cane and a snowflake pendant/ornament :) Enjoy!
And please remember to share with your friends if you'd like to see more.

Wednesday, July 24, 2013

Review and comparison; Mold maker

Review and comparison; Mold maker

 
Time for another quick review/comparison - this time for mold putty. I have 3 different brands, and I'll let you know what I think, pros/cons etc. Hope this will be helpful to some of you.


Sculpey mold maker:

It comes in a 'clay form' - 2 Blocks where you have to take however much you need, Push an item into it, bake and you have a mold. It's very soft and quite 'sticky'.
I got this in the beginning of 2011. I tried it out right away and made a couple of molds,. Haven't used it since, and threw out the molds. It claims to make flexible molds.. They really aren't that flexible, and it'll crack if you try to bend them too much. Besides that, you'll also need to apply some type of starch or 'mold release' medium, otherwise the clay will just stick to the mold, exactly as if you'd made the mold from scrap clay.
The only 'pro' I can think of is, that it can act as a clay softener as well. I really wouldn't recommend this for mold making.
 
I got mine from clayaround.com

Amazing mold putty:

This is what I've been using the most - it's a 2-part silicone putty that you mix equal parts of. You then have a couple of minutes to shape it and create your mold. it's easy to Work with and takes approx. 20 minutes to set, but I recommend leaving it for a bit longer, just to make sure it's completely hardened and not sticky anymore.
I've repurchased this product 3 times, I think, and I really like it. The molds are super flexible and pretty durable. The 'texture'/finish of the finished mold is slightly 'rough'. Hard to explain.. It's not really that noticable when working with polymer clay, but if you're using it for liquid clay or resin, you may not get that pretty smooth surface you want.
 
I get this from metalclay.co.uk

Siligum:

My most recent purchase when it comes to mold makers. It works the same way as the amazing mold putty - you mix 2 parts, create the mold and let it set.
The consistency is more on the sticky side and it takes approx. 10 minutes to set. I don't think it's as durable as the amazing mold putty - it can crack if you bend the molds too much and it's easier to cut through (so you can harm the molds when cutting off excess clay). However, it has a smoother texture when cured and seems to Work better for projects with liquid clay or resin.
Last thing I feel like mentioning about this is, and I don't know if  this is just me, but I feel like the unbaked clay releases from the mold as easily as with the AMP? Nothing a bit of starch can't fix, but could cause a problem for certain projects.
 
Got this from metalclay.co.uk as well
 

What do I recommend?

well,. Anything but the sculpey mold maker really. I will probably continue to have both the AMP and siligum on hand, so that I can choose the mold putty I want to use for each clay project. It's a matter of preference and needs.

Sunday, June 30, 2013

Experiment; Over-baking polymer clay?

Experiment: Over-baking your polymer clay?


Ever since I bought that 'efcolor enamel' mini stove you've heard me talking about a few times, I've been wanting to make this experiment; What will happen if you over-bake your clay?...
You see, the efcolor stove gets really hot and if you bake any clay in there, it's very close to the surface (hottest place). I usually just use it for baking a master before making a mold, making clay plates etc.. But I noticed that the pieces that have been baked in there were pretty much unbreakable (extremely flexible). I'm not going to take a guess on the exact science of this ;) But I thought that the same effect might be possible to achieve with a regular oven, if you were to bake the clay for longer.
 
On the packages of clay I have, they tell you a temperature and that they clay should be baked for 15-30 minutes. Obviously I've always thought that the 30 minute mark would be somewhere around the 'max' for how long you should bake your creations. Apparently it's not - I was working on a new doll and was going to use the oven anyways, so I took a piece of the clay mix I used for the doll, rolled it into a snake and put it in the oven for an hour... Yes! an hour! haha.
I didn't cover it with tin foil or anything else, I just put it on the baking tray and into the oven. Besides the fact that it had a slightly different smell when I opened the oven (not any major difference) it looked fine. The color hadn't changed, and... it was extremely flexeble - now, I haven't tried wiggling it back and forth for multiple minutes, but I've bent the piece 5-10 times creating a narrow u-shape (from that straight snake) and it didn't show any sign of cracking! it just went slowly back to being a straight snake of baked clay!
 
I've tried with some more pieces of clay and even though some of them became slightly darker in color (probably depends on the brand), none of them got burnt. I'll still recommend to cover it up with tin foil, just in case - and it's a good idea to make some test pieces if you're thinking of trying this; Not all ovens are the same when it comes to heating, baking and cooking, and it'd be a shame to ruin a clay creation that you've spent time making, but I just wanted to make this quick post about the result of my experiment :)
I'll definitely be doing some more testing and figure out the minimum time frame for getting the clay to be that strong.

Sunday, May 19, 2013

Mixing polymer clay colors

Mixing polymer clay colors - when making realistic miniature food

This may sound like such an easy post to make, but it's not, at least not for me. I've postponed it so many times because I couldn't figure out how to go about doing it. I first thought of taking pictures for every color mix in an attempt of showing the exact amounts of clay mixed - but truth is, that I always eyeball the amounts of each color; once you mix them, you can add more of some colors to make the shade just right.
Besides - when I write 'basic bread/dough'-color, it's not going to be the color you want to use for all bread and pastries. Danish pastries, as an example, has a very yellow undertone while scone or dinner roll often has a more dull/grey undertone. The colors will need to be adjusted for each project, but I hope this will help some of you get a basic idea of how to mix the right color.

I'm sorry if some of this seems like a 'no brainer/doooh, of course!'-post, I'm just trying to go through the very basics - Definitely leave me feedback if you need something else added or for that matter, if you think this was helpful.

Tip #1: Look at the real thing.
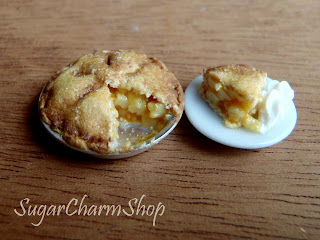
I've told you many times that I have a picture of the real dish/food/item when I'm going to sculpt something. This will help you recreate the right shape, texture and color. 'Baked' stuff like bread or cooked things like a turkey are the tricky ones because you're not going to mix the color that you see on top - you'll need to look at what's underneeth.. Makes sense? eg. take this apple pie that I made; a nice golden brown, right?. No, if you look at where it's been cut you can see that it's an extremelt light doughy-type color. The same with a turkey - go for the color of the actual meat, not the crust.

Tip#2: Layer the colors!
An apple isn't just green or red - If you look closely you'll see lots of different shades which combined creates the final color. If you make a batch of cupcakes the top will become darker than the rest. Use the clay base in combination with soft pastels, paint etc.. Build up the color.
- Of course there'll be some things that are just 1 color; A piece of chocolate could be one of them.

On the pie I used a more yellow shade of pastel on top and as I moved towards the edge I used a golden brown, a red-ish brown and finally a dark brown.

-->

Working with translucent clay;
The translucent colors are the ones I get the most questions about, and they're the hardest ones for me to explain. My best advice is to experiment; Know the material you're working with, know what it will look like once it's done baking. I find that you always need more of the 'translucent' clay than you think. The color may look too light when you're mixing, but it'll become a lot more vibrant once baked.
You can make small color samples and bake them to see what the final result will come out like before you begin making a huge project.

There are many ways of mixing each color, these are just examples of the mixes I use the most.

- Basic bread/dough:
I like starting of with a flesh/beige color as the base. Cernit fleshtone, Fimo sahara or champagne are great for this. Depending on which type of dough you need to make, you'll have to add more colors to it. Most often I'll mix in some yellow and sometimes a small amount of orange to make the color appear warmer. If I need to lighten the mixture I'll add white, and if I need to darken the mixture I'll add Fimo/Cernit 'caramel' so that it maintains the warm undertone.

- Meat:
Raw: Depending on what type of meat, you'll of course need to use different colors.
For the raw steaks on the tray you see here, I used Premo alzarin (I believe it's called) as the base - a nice deep red. I mixed it about 50/50 with translucent, and I even believe I added some beige/dough colored clay afterwards, just to dull the redness a bit. For the raw hams/legs of pork I mixed both beige, red and orange for the base-mix.
Cooked: For something like a cooked ham I'll mix a pink (midtone to light pink, not hot pink) with some red and a tiny amount of dark brown - then I'll add white as I go till I get the color I want. For poultry (chicken, turkey etc.) I'll use mainly beige/champagne/sahara-ish colors and depending on the undertone of the meat I'll add a small amount of pink, brown or yellow.

- Lettuce
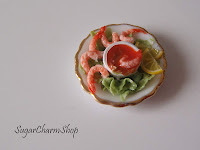
For lettuce I recommend a nice bright/light green - personally I love using 'Cernit light green' - the bright tone will give you that 'fresh, crisp' look. But obviously a piece of lettuce isn't that bright in color, so I usually mix in some white Cernit, but not too much (Or you can mix in some opaque white + translucent). Sometimes I'll even add a small piece of the beige (yes, I use beige tones a lot) to take away some of the green. This mixture is the base and main part of my lettuce - for a more realistic look try mixing in both some darker and lighter shades, creating a marbled look. The variation in color will add so much more to your piece, even though it's barely noticable.

*If there's a color you think is missing, let me know!*

Wednesday, May 8, 2013

Cleaning the craft room

Still cleaning the craft room...

I'm still trying to get everything into place in my new craft room.
You may be able to see that I put the other desk right next to the first one. The second desk is now where I keep all my nail art supplies - but the surface of the desk will be kept almost empty in case I need some temporary space to do other craft projects.

This is what the room looked like earlier, when I started cleaning..


And this is what it looks like now - I deserve a break, right? Will continue cleaning soon, promise! Can't wait to actually be able to sit down and do some crafting! But I can't believe that all of this used to be in my small craft corner...


I'm doing pretty good, huh? I think so too! :)
Hope you don't find these updates too boring. As soon as I'm done with the room, I can get back to making miniatures, working on my new dollhouse and making reviews etc. for this blog.

---------------

A few hours later;
Almost done!!

I've also added a bunch of miniatures to my Etsy shop - I'll look through whatever I have left from the fair and add most of it to the shop soon :)

Wednesday, May 1, 2013

Moving into the craft room

It'll take some time to get everything neatly organized - this is what I managed to get done yesterday inbetween moving things and cleaning the old apartment.

I've organized fabrics, set up most of my "frequently used" tools and put a lot of small bits and pieces in drawers (the drawer units from my craft corner). The desk you see in the picture is one I bought for my new room - or rather 2.... A man was selling them as he didn't want them anymore; they'd been used by his 2 sons who has now moved away from home. I only payed around 60 $ a piece! Really good deal, if you ask me - they look as if they were new and they're very heavy and sturdy. Desks similar to these could easily cost more than 200$ in stores (at least here in DK).. And I'm not going to spend 200$ on something that'll be used near large amounts of paint, glue and probably cut into multiple times by different sharp tools! Haha.

I'll show you more pictures of my progress later today, though I'll spend the most time making the final preparations for the miniature fair this weekend; we're leaving tomorrow (CelineHedegaard and I).


Monday, April 8, 2013

Scrap clay

Tips for scrap polymer clay...

Beware!.. No but seriously - how can anyone gather so much scrap clay? Am I the only one with this problem?...

You know how you're working on different projects and you push the leftover clay out towards the sides of your work surface, until it at some point overfloats and there's no longer room for you to make anything?.. I'm struggling with that problem constantly! When I started making miniatures in 2011, I soon after began putting leftover clay into this little container... Didn't think it would build up like this! And imagine, I actually frequently throw away large pieces of clay because I know, that I'll NEVER EVER get to the bottom no matter what I do. I know it's a waste, but I've given up.

What to do with it then?
Well, there are a number of things you can do with a mountain like this, and if you know of something I'm not mentioning, please feel free to let me know :)
- Obviously, the most logic thing to use it for, is new clay projects - it's perfectly good clay in any color you can imagine, and you're more than likely to need the same color some other day.
- When I first started out doing clay charms and miniatures, I used it to make molds; press your master into the clay, bake it and there you go! - keep in mind that you'll need some type of release agent like corn starch, so the unbaked clay won't stick to it. Also, another thing to remember is that you won't be able to make molds for everything, as these aren't flexible like those made from Amazing Mold Putty etc.
- If you, like me, make all your masters (the items you make molds from) yourself, the scrap clay is great. You can use the most 'yucky' colors, because at the end, the color really doesn't matter since you're only using it to make a mold from.
- You can use pieces of lighter colors (shades that you probably won't use very often, eg. weird colors made when mixing cane pieces) to clean your hands and work surface, as the dust will stick to it.
- Mix and marble! - especially if you're making charms and other types of clay creations this comes in handy. Mixing the different colors, creating a marbleized effect, can look absolutely amazing for jewelry pieces!
- Make tools and stamps; If you use a ball of tin foil or some other object to create texture a lot, you can make a clay mold/tool to use instead. This way you can make a nice handle to grab onto... If you'ce seen some of those hams I've made, I used scrap clay to make the 'stamp'. I first rolled out a sheet of clay, used a needle tool to press the pattern, and lastly pressed another piece of scrap clay onto the baked imprinted clay sheet to make the stamp :)
- You can use it as stuffing for other projects - if you're making something like a cake covered in fondant, you can use the scrap clay for the insid. If you're going to cover it up anyways and you're not going to slice a piece... then why use your good clay for this?
- For caning.. You know how the end pieces of canes get more distorded? Sometimes that ruins a perfectly good looking cane. I've used scrap clay to create new end pieces for my canes before rolling them out; worked really well and resulted in more 'usable length' of the cane.


Saturday, March 30, 2013

Quick tutorial; Lettuce

Lettuce for polymer clay creations and miniatures

Lettuce is one of those things that you can use to decorate almost anything, seriously, anything! With the exception of cakes, ice cream, candy and... okay, so maybe not anything - but a lot of things.
I love using lettuce to decorate arrangements of meat, fish, cheese etc.
You can use this technique to make lettuce for your 1:12 scale miniatures, charms or other polymer clay creations :)


-->

Materials needed;
-Polymer clay in a lettuce color (various shades of green, white etc. can be used for this)
-Mold maker (I'm used Amazing mold putty)
-Sharp blade or exacto knife
-Mixed tools (embossing tools, craft knives etc.)


When making lettuce, I like to use various shades of green to achieve a more lifelike appearance. I use a mixture of different green shades, white (Cernit) and sometimes even 'champagne' or 'sahara' for mixing in with the green to 'dull' the "neon"-like-briiiiiight-ness.
Next you'll need to make some molds that can be used to make the texture of the lettuce - In the picture above you can see 3 of the ones I've made. They're actually really easy to make; Prepare a small amount of mold putty, roll it into a ball and flatten it (you'll need to work pretty fast). Use various toold to make the texture; emossing tools, needles, clay blade, tin foil - whatever you have lying around. It doesn't have to be perfect, and it doesn't have to follow a specific pattern. You'll need to make 2 for this method :)

Slice off some very thin pieces of green clay and place them on top of one of the molds. Place the other mold on top and use your hand or fingers to add pressure.
Then simply remove the top mold! - fresh, yummy (clay) lettuce, ready to serve! :)

Sunday, February 24, 2013

Tutorial: Paper rose

1:12 scale miniature flower: Paper rose


-->

Hey! hello, how are you? long time no see!
A lot of things have happened the past few weeks, and it's been hard for me to find a balance between crafting, blogging and making YouTube videos - I've started making nail art videos again after a 1-year break! so glad to be back on there :) You can check out my videos if you're interested: 3TanjaJ3.

Anyways, here's the first flower tutorial. It should have been posted in January,.. oh well.

Materials needed:
-Paper
-Watercolors
-Paper punches (or scissors if you're going to cut the shapes yourself)
-Embossing tools, or any rounded tool
-Glue
-An eraser or something similar (rubber-ish)
-Green wire, preferably paper wrapped.

Tweezers, exacto knife + matte and glossy glaze are some more tools that can come in handy for this. You can use other tools and materials if you want - you might also need other things when making different types of flowers. I'll be showing you how to make an easy, basic rose.

1) - Begin by painting a piece of paper on both sides. It doesn't have to be perfect at all - a slobby paint job often looks better for petals because of the variation in color.
2) - Cut out petals with a paper punch or scissors. I used a heart shape for these. Use an embossing tool and your 'eraser' to shape the petals. I'm actually using a piece of amazing mold putty that I shaped into a circle :)
3) - Add a bit of glue to the wire and wrap around the first petal. Now continue adding petals till you're happy with it.
Repeat - add more petals :)
I used another paper punch for the leaves, but painted the paper green instead. If you want, you can add a lot more details and create the look of veins etc. To finish off the rose I touched up the color on the petals and added a thin layer of glaze.


Sunday, January 20, 2013

Efcolor stove review

Today is the deadline of my giveaway - any entries entered today will be accepted. The winner will be announced the 25th of January.
If you read my post about out mailbox you may understand, that I have had problems receiving my mail - which also means that I currently do not have the giveaway price. If it doesn't get here before the announcement, please have some understanding. But whoever wins, WILL get their price, and I'll ship it as soon as I receive it.

Review; Efcolor stove set/ "oven"


Some time ago I showed you this picture.
I ordered the Efcolor stove set from metalclay.co.uk And now that I've tested it out some more, I'll give you my review and opinion about it.

Why did I order it?
well, you can use a regular oven to melt the efcolor enamel, and it works perfectly! but I wanted to try out this set for a few reasons;
I bought the enamel powder mainly to use when making miniature dollhouse plates, pottery etc. and heating up a regular oven just to make maybe 4 plates is rather stupid. I also thought it would be more convenient - it's small and portable, meaning that you can bring it everywhere. It's powered by 3 tea-lights, so the heat is practically free! yeah, you have to buy some candles (the set comes with 3 candles) and you'll need matches or a lighter... but those are both very cheap. The fact that it's powered by 3 tea lights is amazing, you can literally do the enameling anywhere you want.

-->
In the set:
I looked up the enamel stove set on both a danish website and the metalclay site. The stove set you'd get from the danish site had the stove itself - not sure if it had the tea lights in it. The set from metalclay offered a set including all the pieces you see in the picture - and even though I live in Denmark, I ended up paying less than I would have on the danish site! amazing! :)
What you get:
-Stove
-3 stands to hold pieces. These are great if you're going to enamel both sides of a piece.
-"Tweezers" a very wide nosed pair of tweezers, I actually find it great for picking up my plates.
-Spatular, a small spatular to help remove items from the hot stove.
-A large round spatular/plate with handle; making it easier to insert and remove things from the stove.
They also included 2 small leaflets about the Efcolor products.


Baking polymer clay, and baking polymer clay with enamel powder:
On the box, I believe it said that this small stove has a surface temperature of approx. 160-180 celcius. In celcius the normal baking temperature for polymer clay is approx. 110-130. So this stove is quite a bit warmer.

For the first test I placed a prebaked polymer clay plate (had been baked for 5 minutes in a regular oven) on one of the spatulars and placed it in the Efcolor oven.. I don't recommend this - it didn't take long before the clay bubbled up a bit and got burnt. I then placed a plate on top of one of the small rectangular stands - this worked well. I did the same with a plate, this time adding enamel powder to it, and the result was a beautiful plate, just as if it had been in the normal kitchen oven.
The stove set is pretty hard on the clay due to the temperature (just like a toaster oven). The clay can therefore easily be discolored (eg. white clay turning off white).
One thing I noticed, is what you see in the picture above.. I baked a "cane" (left), cut off a slice (right). I was able to bend the slice as much as I wanted. the high heat apparently made the clay really strong.
I am not going to use this oven to bake my miniature food, because I don't want it to be discolored, but I will continue experimenting with both this stove set and my regular kitchen oven, trying to overbake and bake at higher heat settings. and I will let you know the results when I've tried it out.

Do I like the Efcolor stove set?
yes! - it gives you "free heat".. It heats up in just a couple of minutes..
I think it's great for making pieces with enamel on top, and it would work perfectly for baking stuff like sprinkles and other tiny decorations for your polymer clay creations. You can even use it for baking a master that you need to make a mold from.
I guess you can even adjust the heat by removing one of the candles.. but I wish there was some kind of indicator. I am extremely happy that I bought it, and will be using it a lot :)

Friday, January 18, 2013

Tutorial: Piece of toast/ Slice of bread

Tutorial; Piece of toast in 1:12 scale miniature

For dollhouses or use for charms

I'm back! I know, this should have been up Wednesday? - technical difficulties, literally. This is a very quick and simple tutorial, but there are a couple of reasons why I'm posting it. Firstly, I used to have a tutorial for small "lunch sandwiches" on my YouTube channel, but all the tutorials I have on there were made when I'd only been making miniatures for a few months, which means that I really, really don't like watching them, ehem.. That did lead me to delete some of them - The sandwich tutorial is one of those that has been requested as a re-upload the most. I'm also thinking of making an addition to this rather short tutorial, showing how to make a couple of different types of toppings. Definitely let me know if you'd be interested in that.

And remember, only a few days left until the deadline of my giveaway :)

-->
Start out by mixing the 2 colors - for the "crust" and the inside of the bread; "white part".
For the crust I took a piece of Fimo Champagne, and mixed in a bit of chocolate brown and orange (only a tiny bit, just to give it a warmer tone). For the white part of the bread I started out with Cernit Champagne - this is a slightly yellow tinted translucent-ish color. I mixed in some fimo white to make it opaque and mixed in a bit of the Fimo Champagne to "cancel out" the white so it wouldn't be quite as light.
Roll the 'white' mix into a log shape and roll out the 'crust' color on one of the thinnest settings on your pasta machine (or just very thin, if you're rolling by hand). Add a layer of the 'crust' color around the white mix and roll it into a thinner log, blending the seems. I used the side of my polymer clay blade to press down onto the log, creating the square shape. Aim for a diameter of approx. 9mm - you can always adjust the thickness by either pushing or stretching the cane.
To give the crust a more realistic baked look, I used a few shades of yellow and brown pastel, and brushed it on randomly.

-->
Cut the amount of slices you want.
1) - Use a toothbrush to give the slice some texture on each of the 4 sides.
2) - Using a fine needle tool, add some detailing around the 'rim'/edge.
3) - Begin adding the texture to the inside of the bread, moving your needle tool in tiny circular motions.
4) - When the entire top surface is textured you can add a few larger holes, just like in a real slice of bread :)

I prefer pre-baking my miniature bread slices for some of my projects - if you're going to make a sandwich it's very helpful as you won't ruin the texture or shape when pressing down the top slice of bread.

you can expect a couple of posts from me this weekend - feel like I'm behind schedule

Saturday, January 5, 2013

Making a 2 part mold - Amazing mold putty

Howto; Make a 2 part mold for polymer clay - using Amazing mold putty

As I've said before, I'd never ever make a mold from one of my miniature dolls, animals or similar sculptures, and I think that molding mediums like these are often misused. BUT, if you have something that you want to make a 2 part mold for, here's a quick how to, using Amazing mold putty;

I made this mold for my "dolls dolls" - Since they're suppose to look mass produced, I needed a mold to make them look almost identical, though you still need to make a few corrections afterwards. I first sculpted the doll using fimo soft, then baked it.


1) - Mix enough mold putty to fit the size of the master (piece you want to make a mold from), keeping in mind that this is only for either the front or back. Flatten it and push your master into it - till it covers one half.
Let it cure completely before you continue.
2) - Amazing mold putty and many other molding compounds stick to themselves, meaning that if you mix a new portion and let it cure while attached to an already cured mold, it will be pretty much impossible to seperate them. You need some type of release agent - I'm almost certain that vaseline will work, however, I chose to use potato starch. Brush it onto the entire surface, making sure to get into all the creases.
3) - Mix another portion of mold putty - enough to cover the back of the master. Make the second half of the mold.
4) - Once cured, you should be able to seperate the 2 parts. If there are small areas that weren't covered well enough by the release agent, they may stick to eachother a bit, but not enough to make the seperation impossible. You now have a 2 part mold to use with your polymer clay projects :)

Wednesday, January 2, 2013

Websites

Websites I like and recommend for ordering materials


Living in Denmark, I have to buy a lot of materials online, because you simply can't get the right things here - or because the only store that carries it is in the other end of the country. It's okay, I like shopping online - sitting comfortably at my computer, able to take all the time I need, shop at any time of the day and I don't have to stand in line! ;) Only thing that bugs me is, that you have to wait 1-2 weeks for most of the packages to arrive...

So I wanted to share some of the websites I enjoy ordering from. You'll see that a lot of these sites are danish, and only ship to Denmark - when I'm looking for new websites, I have to keep a few things in mind;
It has to be within Europe due to extra fees assigned... If the site/seller happens to come from outside of Europe, I'm only able to purchase for a small amount of money to avoid these fees.
These are sites I've found myself buying from multiple times.

-->
Metalclay.co.uk
I love this site, it has tools, polymer clay mold putty,.. a bunch of different things including materials for working with metal/silver clay, ceramics, glass etc.
This is also where I've bought most of my Efcolor enamel products.

Clayaround.com
Great, great site if you're looking for polymer clay and tools, and so many other things as well.

Forest-fibres.co.uk
Now, I'm very sad right now - apparently this site no longer exists? I used to buy all my mohair/alpaca/rabbit-hair from this site,. The hair I use for my dolls. I'm still writing the link in case it'll get back on. They sold mohair for around 1.75£ for 30grams, which is really cheap. They even had an ebay account that I can no longer find either.

Ebay.com / Ebay.co.uk
This,... is by far my favorite place to shop for materials, accessories for my phone, ipad, nail art supplies, books, gosh, great, amazing place.. not good to your wallet, but great site!
For those who are in doubts about ordering from here, because they're afraid to get scammed and not receive the package; don't worry. I wouldn't by Chanel bags or Mac makeup products from here, but it's an awesome place for buying miniature ceramics, glue, whatever you need for your crafts. The sellers that are on ebay are all aiming for those 5 star ratings, so why would they try to scam you?
There's been 2 times where my package hadn't arrived after the time limit had passed, so I wrote a message to the sellers and they sent out a new package right away.

www.oncesoreal.com
A german site, so if you don't speak just a little german, I wouldn't recommend it. I bought my Jo Sonja's paints from this site. They sell reborning supplies, but stuff like mohair and paints can be used for miniature dolls and smaller sculptures as well :)

Stof-mutter.dk
Danish site - great selection of patchwork fabrics = small patterns, really nice for miniatures.

Nordform.dk
Danish site - They sell polymer clay and a bunch of other craft supplies,. I only order the clay though ;)

Ravstedhus.dk
They carry the Efcolor enamel products. When I only want to buy a fe items, it's better for me to have a danish website as oppose to a UK site. (cheaper shipping costs)